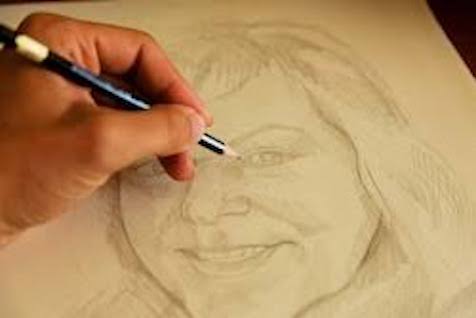
How to Draw Portraits: Quick Tutorial
I know many beginning artists who want to start right from scratch and draw a portrait of someone they know or someone popular. Drawing great portraits is like the holy grail of drawing. Creating realistic and living portraits needs a high skill level near to mastery. Fortunately you can learn these skills much easier, if you learn them separately.
The first step is learning to draw different features of the human face. By separating single features and drawing them separately you can learn faster. You’ll concentrate on perfecting one feature at a time. So you improve your understanding and knowledge of the details. Fill several sheets of paper with eyes, noses etc and you will get a feeling how they look and how to draw them. But don’t draw too small. Two eyes, mouths or noses on one sheet (letter or A4 sized). That leaves you enough space for details.

The next step means putting together all you have learned when drawing the features one at a time. You have to place the facial features in correct proportions, distances and layout so they fit together and the big picture makes sense. So what is the correct layout?
There are a few rules that help you to place the features on the right positions:
- The eyes are located halfway between the top of the head and the chin. This is one of the most important lessons to learn when drawing portraits. Many (me, too) tend to place the eyes too high, so the portrait gets a flat forehead. It seems to be some optical illusion that makes us think the eyes are placed higher than they are.
- Another problem with the eyes is their positioning to the left and the right. Between them there should be enough space for exactly one more eye. The same to the left and right – between the eyes and the border of the face is enough space for one more eye. All in all in a human face has enough space for five eyes in a row (although this would look a bit strange).
- As we are placing so many eyes into one face, let’s add two more. This time they help us to place the eyebrows where they belong. The distance between the eyebrows and the eyes is equal to the eyes’ heigh.
- Then the bottom of the nose can be found halfway between the eyes and the chin
- Halfway between chin and nose is the mouth
- The mouth’s corners can be found below the center of the eyes. But this can differ a lot as there are many people with wider or narrower mouths
- The ears’ top starts where the eyebrows are and their bottom may line up with the bottom of the nose. But these measures can vary as people have a wide variety of differently sized and shaped ears.

Using these rules you should be able to position the facial features correctly. But always keep in mind: these measures and positions are idealized! In reality these measures will differ slightly. That is what makes up the personality of a human face.
And that’s what the most important skill for portrait drawing is about. You have to master this third skill to draw portraits that resemble the original model. Each human face has its personality and looks special. There are two reasons for this:
* First the facial features itself differ slightly by shape, color or size (for example broad vs. narrow noses, thick vs. thin lips, etc.)
* Second, the layout of the facial features differs slightly from the idealized measures I showed you before. The eyes can stand a little bit narrower, the chin may be stronger or weaker. Finally this changes the overall layout of the face and gives it personality and uniqueness.
The key for drawing resembling and live like portraits is to capture these slight differences and bring them to paper. This needs much practice and a trained eye. But the more portraits you draw the better you will learn how to draw portraits and the more resembling your portraits will look.
So what are you waiting for? Start drawing portraits!