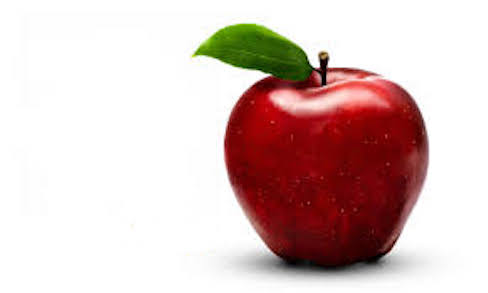
How To Draw a Big Red Apple
Depicting apples using a pencil is a great way to practice shading and basic pencil techniques. And tell you what: the same is true for colored pencils. There have been quite a number of requests recently, so I’ll use the much depicted apple motive to demonstrate the basic techniques for colored pencils.
Many beginning artists are reading this, so I’ll avoid those mumbo-jumbo color names you find in many drawing books.
If you’re a color pencil expert or master artist – please forgive me 🙂
Have your colored pencils ready? Paper at hand? Maybe you have also an apple available to place it in front of you for later reference.

Okay, then let’s get started: start by drawing a fine outline of the apple using a graphite pencil not too soft. Use a 2B or harder. The outline should be fine – fine enough that the outline can be covered by the colors we’ll be adding layer by layer in the next steps.

During the second step we create a first layer of color – use a yellow or a slightly greenish yellow. Although the apple will look red in the end, we want the yellow as primer to shine through here and there as it does on a real apple, too.

Third step: now it’s time to add some more color. Create a layer of orange red. But make sure to leave out the part where you want to add the highlight later.

Fourth step: this time we take on the darker areas. You might have expected we’d be using black or a graphite pencil. No. A great colored drawing lives from the balance of different colors. So we apply a darker red to the darker areas and a blue to the darkest shadows. Blend the different areas seamlessly. If you want to, you may use a blending stump or tortillion.

Step five: ok let’s turn to the stem cavity. Naturally the apple’s skin is more yellow here. So we add yellow and orange colors here.

Sixth step: if you look at an apple’s stem closely, you’ll see it’s not black or brown as many believe. It’s a mix of green and brown. So draw the stem by coloring it green first and then adding a darker brown layer in a second step. Let the green shine through here and there.

Step seven: the same as in step four is true for the shadow below the apple. No graphite pencils. Instead use a dark blue or violet to draw the shadow beneath the apple.

Step eight: now we’re almost done. Let’s use a white pencil for the highlight. Also you may add some reflections on the sides of the apple.
Last step: finally let’s add some of those colored spots that are characteristically for many apple breeds. Use an orange or orange-red pencil. Sharpen it. And then hit the apple here and there to leave such spots.
That’s it. By now you should have created your first apple using colored pencils. Astonishing how natural and realistically it looks, isn’t it? Keep practicing and soon you’ll be able to draw a lot more subjects the same way.
Enjoyed this simple step by step tutorial? Let me know so I can prepare more tutorials like this.